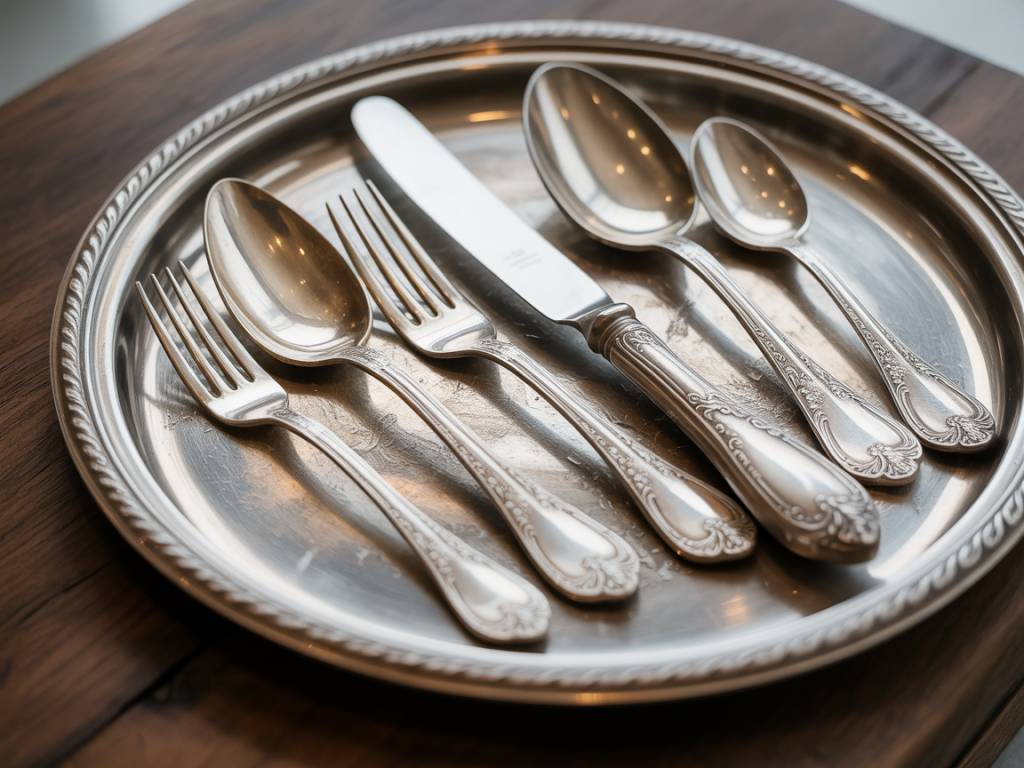
There is something quietly magical about polished silver. A tray catching the late-afternoon light, a row of teaspoons lined like tiny mirrors beside a teapot, a serving fork that’s seen three generations of Sunday lunches. When silverware shines, a room feels a little more loved, a little more ready to welcome.
But many of us hesitate before opening that tarnished drawer or inherited box. How do you remove years of dullness without stripping away history – or damaging delicate details? How do you coax back that soft glow in a way that’s safe, gentle and sustainable?
Let’s walk through it together, step by step, so that your trays, cutlery and heirloom pieces regain their light and keep it as long as possible.
Understanding why silver tarnishes (and why that’s not all bad)
Tarnish is the dark, sometimes rainbow-like layer that covers silver over time. It forms when the silver reacts with sulfur compounds in the air (and sometimes in food, wool, rubber or cleaning products). What you’re seeing isn’t dirt – it’s chemistry.
Here’s the reassuring part: tarnish isn’t a sign of neglect, it’s simply what real silver does. In fact, a very light patina can actually add depth to engravings and patterns, making them appear more dimensional. The goal is not to scrub your silver into looking brand new, but to restore a gentle glow while respecting its age and character.
Once you understand that, polishing becomes less of a battle and more of a conversation with a beautiful material.
Before you start: identify what you’re cleaning
Not all “silver” is created equal, and how you polish will depend on what you have. Take a slow moment at the table or kitchen counter, lay everything out, and examine each piece.
- Sterling silver: Usually stamped with “925”, “Sterling”, or a lion passant (UK hallmark). It’s solid silver all the way through.
- Silver-plated: A thin layer of silver over a base metal (often brass or nickel). Look for markings like “EPNS” (electro-plated nickel silver), “Silver plate”, or no marking at all.
- Heirlooms with unknown composition: If it looks silver but isn’t marked, handle as if it’s silver-plated to be safe.
- Decorative details: Check for applied decorations, inlays, wooden or bone handles, or glued elements. These can react badly to water or harsh cleaners.
Why it matters: sterling silver is more forgiving; you have silver all the way through. Silver-plated items are like a thin coat of paint — rub too hard or too often and you’ll eventually expose the base metal underneath.
What to absolutely avoid on silverware
Internet hacks can be tempting, especially the ones promising “instant shine” with dramatic before-and-after photos. But some shortcuts come with a long-term cost.
- Abrasive powders and rough pads: Baking soda as a mild paste can be acceptable if used gently, but dry, gritty scrubs, scouring powders, steel wool and rough sponges will scratch silver’s surface.
- Toothpaste: Often suggested, but many formulas are too abrasive and can leave fine scratches.
- Bleach or ammonia-heavy cleaners: Too harsh; they can damage silver and any glued or decorative parts.
- Prolonged aluminum-foil “bath” treatments: The classic baking soda and aluminum method is effective but can strip away desirable patina and sometimes leave an odd matte finish if overused. It’s better reserved for very tarnished everyday pieces, not heirlooms.
- Immersing handled knives: Knives with hollow or glued handles (especially vintage ones) can be ruined by soaking; water seeps in and weakens the joint.
When in doubt, choose the gentler path. It may take a little longer, but you’ll extend the life of your pieces beautifully.
Your gentle silver-care toolkit
You don’t need a cupboard full of complicated products; a small, thoughtful kit will see you through most situations.
- Soft cotton or microfiber cloths: Old, clean t-shirts work wonderfully.
- Mild dish soap: Preferably unscented and free from added moisturizers.
- Soft toothbrush or artist’s paintbrush: For crevices and detailed areas.
- Quality silver polish: A cream or paste specifically designed for silver (not brass, not chrome).
- Warm water in a basin: Not hot, to protect glued parts and delicate inlays.
- Cotton buds (Q-tips): Perfect for gently working polish into tiny details.
- Optional natural helpers: Baking soda and white vinegar, to be used in careful, diluted ways.
Lay a soft towel on your work surface, put on some calming music, and think of this as a small ritual of care rather than a chore.
Step one: simple washing to lift everyday film
Before polishing, always remove dust, grease and fingerprints. Otherwise, you’ll be rubbing dirt into the silver as you polish.
For trays, cutlery and sturdy hollowware, this gentle wash is usually safe:
- Fill a basin with warm water and add a drop or two of mild dish soap.
- Place a folded cloth or towel at the bottom so pieces don’t clink directly against hard surfaces.
- Wash each piece individually with your fingers or a very soft cloth. Avoid soaking knives with hollow handles or anything that looks fragile or repaired.
- Use a soft toothbrush to lightly clean around engravings, hinges or decorative rims.
- Rinse thoroughly in clean warm water.
- Dry immediately with a soft cloth to avoid water spots.
Often, you’ll find that a proper wash already brings back a surprising amount of shine. Polishing then becomes a light touch-up, not a rescue mission.
Step two: polishing safely with a dedicated silver polish
For most silverware — especially heirlooms — a commercial silver polish is the safest and most controllable option. Look for a reputable brand that specifically mentions being non-abrasive.
Here’s a gentle method that works for trays, cutlery and decorative pieces alike:
- Test first: On a small, inconspicuous area, especially if the piece is old or sentimental. Check that it doesn’t remove too much patina or alter the color.
- Apply sparingly: Put a tiny amount of polish on a soft cloth, not directly on the silver.
- Work in sections: Start with a corner or a small area and use light, linear strokes rather than circles. Circular motion can create visible “swirl” patterns.
- Let it haze: Many polishes need a moment to dry slightly and turn cloudy; follow the product’s instructions.
- Buff gently: Use a clean part of your cloth to buff the area until it shines. Turn the cloth often so you’re not just moving tarnish around.
- Mind the details: For engravings or patterns, use a cotton bud or soft brush with a hint of polish, always with a delicate touch.
- Rinse or wipe: If the polish instructions recommend it, wipe the piece with a damp cloth or rinse quickly, then dry completely.
Notice how the silver responds. Some pieces almost glow instantly; others reveal their shine more gradually, as if they need a little persuasion. Let each one guide the pace.
Thoughtful use of natural methods
If you prefer to reduce chemicals at home, you can integrate a few simpler, more natural methods. The key is moderation and choosing the right candidates.
Mild baking soda paste (for everyday, non-heirloom silver):
- Mix 3 parts baking soda with 1 part water to create a soft, spreadable paste.
- Apply a very thin layer with your fingers or a soft cloth.
- Gently rub, using almost no pressure.
- Rinse thoroughly and dry immediately.
Avoid this method on silver-plated items with very thin plating, or on pieces with intentional dark patina in the recesses (oxidised designs), as it can gradually lighten those shadows.
Quick vinegar refresh (for lightly tarnished cutlery):
- Prepare a basin with warm water and a splash of white vinegar.
- Dip the cutlery for a minute or two, no more.
- Wash with mild soap, rinse and dry.
This is not a heavy-duty tarnish remover, but it helps lift light film and brighten the surface between more thorough polishes.
For heirlooms, intricate pieces and items with sentimental value, reserve these natural methods as occasional helpers and rely primarily on gentle commercial polish.
Caring for different kinds of silverware
Not all silver objects live the same life. A tray that travels between the dining room and the garden terrace has different needs than a ceremonial teapot used once a year.
Everyday cutlery
- Wash soon after use, especially after contact with eggs, mustard, onions or salty foods, which can accelerate tarnishing.
- Avoid the dishwasher if possible; detergents and heat are harsh on silver and can cause spotting or dullness, particularly on silver-plated items.
- Dry thoroughly with a soft towel, rather than air-drying.
- Give them a light polish every few months, or when you notice them losing their sparkle.
Serving trays and platters
- Use felt or soft cloth pads underneath objects placed on the tray to prevent scratches.
- For trays that live on coffee tables or sideboards, dust them regularly with a dry, soft cloth.
- If tarnish appears in patterns — perhaps where fingers grip the handles — spot-polish those areas instead of treating the whole tray each time.
- For outdoor use (serving lemonade in the garden, perhaps), bring the tray back in and wipe it down once you’re finished; don’t leave it outside overnight.
Teapots, jugs and hollowware
- Never immerse pieces with hollow handles or visible joints for long periods; moisture can creep inside.
- Clean interiors with warm water and a tiny amount of mild soap if needed, then rinse thoroughly.
- Polish the exterior surface gently, watching out for knobs, finials and spouts where details can be delicate.
Heirlooms and very old pieces
- Focus on preserving patina rather than chasing a mirror finish. The soft shadows in engraving tell the story of age and use.
- Polish only when needed and as lightly as possible.
- If a piece is especially valuable or fragile, consider having it assessed by a professional restorer before attempting any major cleaning.
- For items with mixed materials (ivory, bone, wood, mother-of-pearl), keep water and polish away from non-silver parts and work in small, controlled areas.
Storing silver so it stays bright longer
The way silver rests between uses has a huge impact on how often you’ll need to polish it. Think of storage as a cosy, protective cocoon.
- Keep it dry: Moisture accelerates tarnish. Always dry pieces thoroughly before storing.
- Separate from rubber and wool: Both can emit sulfur compounds that darken silver faster. Avoid rubber bands, wool felt and certain foams in direct contact.
- Use anti-tarnish cloth or bags: Special silver cloth (impregnated with tarnish inhibitors) is ideal for wrapping heirlooms or lining drawers.
- Store cutlery in rolls or lined trays: This prevents pieces from scratching each other and reduces exposure to air.
- Add a gentle tarnish absorber: Silica gel packs or purpose-made anti-tarnish strips, placed in drawers or cabinets, can quietly help in the background.
And perhaps the most charming tip of all: use your silver. Pieces that are regularly handled, washed and dried tend to tarnish more slowly than those left untouched in a cupboard.
Creating a simple silver care ritual at home
Instead of waiting until everything looks dramatically dull, build a soft, sustainable rhythm around silver care.
- Seasonal check-ins: At the start of a new season, choose one afternoon to refresh a few key pieces — the tray on the entry console, the dessert forks, the teapot that comes out for cosy winter tea.
- Post-celebration reset: After a dinner party or family gathering, add “quick silver refresh” to your tidy-up routine. A swift wash and dry now prevents heavy polish later.
- Shared ritual: If you live with others, this can be oddly meditative to do together — one person washing, one person drying, one softly polishing. Stories about where each piece came from tend to appear naturally.
With time, your silverware stops feeling like a responsibility waiting in a dark drawer and becomes part of the lived-in beauty of your home: used, cherished, and gently maintained.
Styling polished silver in your décor
Once your trays, cutlery and heirlooms are gleaming again, let them shine beyond the dining table. Silver brings a subtle luminosity that works beautifully in both modern and traditional interiors.
- On a coffee table: Use a polished tray to gather a candle, a small stack of books and a bud vase. The reflective surface amplifies the flicker of the flame and the softness of petals.
- In the kitchen: Arrange a row of teaspoons in a small silver cup beside the kettle; it turns the simplest tea break into a tiny ceremony.
- On a console or entryway table: A silver bowl can hold keys, collected pebbles, or seasonal treasures like conkers, acorns or dried citrus slices.
- Out in the garden: For an evening on the balcony or patio, serve drinks on a polished tray; the last light of day will catch on its surface, echoing the glow of lanterns or fairy lights.
- As part of a tabletop vignette: Mix silver with natural textures — linen runners, woven placemats, wooden boards, sprigs of greenery. The contrast makes the metal feel warm rather than formal.
Think of your polished pieces as small sources of light, quietly scattering reflections around your rooms.
With the right care, your silverware can accompany you from casual breakfasts to candlelit suppers, from quiet solo cups of tea to bustling holiday tables. Each gentle polish is an act of tending — not only to metal, but to the rituals and memories that unfold around it. And as your trays, cutlery and heirlooms catch the light once more, your home feels just that little bit more ready to welcome whatever moments come next.