
There is something quietly moving about an old chair. The slight creak when you sit, the soft fading of a tapestry arm, the tiny nicks on the legs that hint at long-forgotten conversations. Reupholstering an antique chair is more than a DIY project; it is a gentle act of storytelling, a way to let the past settle gracefully into your present home.
In this guide, I’ll walk you through timeless upholstery techniques that respect the character of vintage seating while making it comfortable and stylish for modern living. Think of it as sharing an afternoon together in the workshop, tea within arm’s reach, fabric swatches spread out like a painter’s palette.
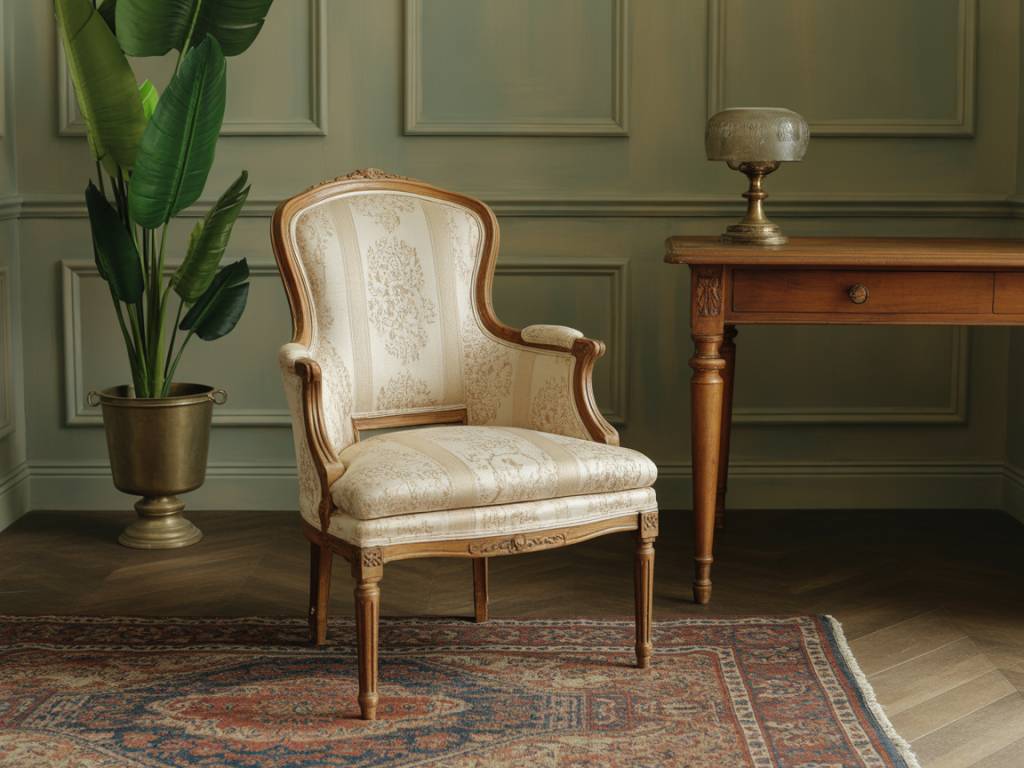
Why an antique chair is worth saving
Before a single tack is removed, it helps to remember why these pieces deserve our care. Antique chairs often offer:
- Solid craftsmanship: Older frames are frequently made from hardwood with joinery meant to last decades, if not centuries.
- Unique silhouettes: Curved backs, carved details, turned legs – shapes that instantly lift a room beyond the ordinary.
- Soul and patina: Tiny imperfections that no factory finish can replicate. The gentle wear tells a story that new furniture simply doesn’t have.
- Sustainability: Reviving an existing piece is one of the most eco-conscious choices you can make for your home.
Upholstery, then, becomes a way to bridge eras: you keep the bones and history, but wrap them in textiles and techniques that feel right for your life now.
First, listen to the chair: assessing what you have
Before you rush out to buy fabric, spend a moment quietly studying your chair. Let it tell you what it needs.
Start with the frame:
- Wiggle test: Gently rock the arms, back, and legs. If there’s movement or creaking, the joints may need regluing or tightening.
- Check for cracks: Look along corners, where legs meet the seat, and around arms for splits in the wood.
- Look underneath: Turn the chair over. Inspect the webbing, springs, and any previous repairs.
Then examine the current upholstery:
- Is the padding lumpy or flat? This suggests the stuffing has compacted or shifted.
- Is the fabric brittle or torn? If it rips easily, you’ll almost certainly need full reupholstery.
- Any signs of pests or mildew? Tiny holes, frass (wood dust), or musty smells need to be addressed before you bring the piece into your main living space.
If the frame is severely damaged or infested, consult a professional restorer first. But if the structure is essentially sound, you’re likely ready to proceed with classic upholstery techniques at home.
Choosing fabric: honoring the past, living in the present
The fabric you choose is the new “dress” for your chair. It should respect the era of the piece while feeling harmonious with your home and lifestyle.
Ask yourself a few questions:
- How will the chair be used? Occasional accent seating can handle more delicate fabrics; a reading-chair-in-the-sun will need something durable and fade-resistant.
- What mood do you want? Velvet for a cocooning, cocoon-like feel? Rustic linen for a relaxed, textural look? A classic floral for a touch of English country charm?
- How does it sit in the room? Your fabric doesn’t have to match everything, but it should “speak” kindly to nearby patterns and colors.
For a sustainable, timeless approach, consider:
- Natural fibers: Linen, cotton, wool, and hemp age beautifully and breathe well. A linen-cotton blend is a lovely, durable compromise.
- Recycled or upcycled textiles: Some brands now offer upholstery-grade fabrics made from recycled fibers or deadstock from the fashion industry.
- Classic patterns: Stripes, checks, damasks, and small florals rarely fall out of favor and feel at home on antique frames.
A small tip: drape your chosen fabric over the chair for a day or two before you commit. Watch how it behaves in the morning light, under lamplight, and next to your existing furniture. Does it still whisper “yes” after a few days?
Timeless upholstery techniques that bring a chair back to life
Traditional upholstery is a craft of layers. It’s less about rushing to staple on new fabric and more about building a comfortable, supportive seat from the inside out.
Careful removal: documenting as you go
Think of this as archaeology with a staple remover. As you strip the chair, take notes and photos.
- Remove decorative trim and save it if you want to recreate the original line.
- Peel off the top fabric carefully, keeping pieces intact to use as templates.
- Notice the order of layers: dust cover, webbing, springs, hessian, stuffing, muslin or scrim, then top fabric.
- Keep any tacks or fittings you remove in small labeled containers.
This slow, observant process is your best teacher. Older upholsterers had a certain logic in the way they built a seat; respecting that order will make your own work smoother.
Rebuilding the foundation: webbing and springs
The foundation is where comfort begins. If you sit on a beautifully upholstered antique chair that still feels like a rock, it’s usually the underpinnings that were neglected.
Webbing
Traditional seat webbing is often jute – strong, slightly rough ribbon-like strips criss-crossed to create a supportive base.
- Use a webbing stretcher to pull the jute taut.
- Attach the ends with tacks or heavy-duty staples, folding the ends under for extra strength.
- Weave strips front-to-back and side-to-side, alternating over and under, until you have a firm grid.
Springs
Many antique chairs have coil springs tied to the webbing. Don’t be intimidated by them; once you get the rhythm, it becomes almost meditative.
- Position the springs evenly and secure them to the webbing with twine.
- Use traditional spring twine to tie the tops of the springs to each other, creating a firm, level “platform.”
- Springs should compress slightly when pressed, but not collapse or lean.
This is one area where timeless technique really shows: a carefully tied spring system can last decades and gives that gentle, buoyant feeling when you sit down.
Softness and shape: stuffing and stitching
Once your springs are in place, it’s time to add comfort and contour.
Stuffing materials
Traditional upholsterers used a mix of natural fillers that are still excellent choices today:
- Coconut fiber (coir) or horsehair for firm support that springs back.
- Wool or cotton batting for softness and a smooth finish.
- Recycled fiber wadding as a sustainable alternative if natural materials are hard to source.
Building the seat
- First, lay a layer of hessian (burlap) over the springs and secure it around the frame.
- Add your firm stuffing (coir or hair) on top, forming a subtle crown (a gentle dome shape is more comfortable than a completely flat seat).
- Cover this with another layer of hessian and stitch through the layers using an upholstery needle to keep the stuffing in place.
- Add softer batting on top for that final welcoming softness.
On more sophisticated pieces, you’ll see hand-stitched edges that sculpt the front and sides of the seat into elegant curves. This “edge roll” effect can be created with rolls of stuffing hand-stitched in place, then smoothed with batting.
Wrapping it all in beauty: the top fabric
This is the moment where your vision finally becomes visible.
Use the old fabric as your guide
Lay the removed pieces of fabric onto your new textile and trace them carefully, adding a little extra allowance if some original edges were frayed. Mark grain lines and any notches or reference points – they matter more than you might think when fitting curves.
Attaching the fabric
- Start with the seat. Position your fabric, making sure any pattern is centered and straight.
- Lightly tack or staple at the center of each side first (front, back, left, right), pulling the fabric gently but not stretching it out of shape.
- Work outwards from the center towards the corners, alternating sides so you keep the tension even.
- At the corners, fold and pleat the fabric neatly, creating small, controlled folds rather than bulky gathers.
Armrests and chair backs follow the same principle: work from the center outwards, keep your pattern aligned, and frequently step back to see the full effect. This is where patience becomes your best tool.
Finishing touches
- Cover the underside of the seat with a dust cover (often black or brown cambric) for a clean look.
- Add decorative trim, such as gimp braid or double-welt cord, to hide staples or tacks along visible edges.
- Consider leaving some wood partially exposed – a carved crest or a beautifully turned leg can be the perfect counterpoint to a soft, textural fabric.
A simple project outline for your first antique chair
If all this feels like a lot, let’s distill it into a manageable, beginner-friendly path:
- Choose the right chair: Look for something with a sturdy, simple frame and minimal damage. A dining chair with a padded seat or an open-back armchair is ideal.
- Gather your tools: Staple remover or flat screwdriver, pliers, upholstery tacks or staples, webbing stretcher, scissors, upholstery needle, twine, hammer, and a tape measure.
- Document and strip: Take photos, remove trim and fabric, and label each layer you remove.
- Repair the frame if needed: Glue loose joints, sand lightly if necessary, and allow everything to dry thoroughly.
- Rebuild layers: Install new webbing, repair or retie springs if present, add hessian, stuffing, batting, then fit your new top fabric.
- Finish beautifully: Add trim, dust cover, and felt pads under the legs before bringing your chair back inside.
You don’t have to master every traditional technique at once. Each piece you work on will teach you a little more, and your hands will grow more confident with every tack you set.
Styling your revived antique chair at home
Once your chair is renewed, the joy is in seeing it quietly transform a corner of your home.
Think of it not just as a functional seat, but as a character in the room’s story:
- In a reading nook: Place your antique chair beside a floor lamp and a small side table. Add a soft throw that picks up a secondary color in the upholstery.
- By a window: Let the light play on the fabric, especially if you’ve chosen a textured weave or subtle pattern.
- At the dining table: Use one or two antique end chairs as gentle “anchors” among simpler, modern chairs for an eclectic but balanced look.
- In the bedroom: An antique chair draped with a robe or a blanket instantly softens the room and offers a quiet place to pause at the start or end of the day.
Allow the piece to breathe. Give it enough room around it so its curves and details can be appreciated. An antique chair doesn’t need to shout; its elegance is often in its quiet confidence.
Caring for your newly upholstered antique
All that effort deserves to be cherished over time. A few gentle habits will keep your chair beautiful for years:
- Rotate occasionally: If the chair catches strong sunlight, shift it a little every few months to avoid uneven fading.
- Vacuum lightly: Use a soft brush attachment to remove dust from fabric and crevices.
- Blot, don’t rub: If spills happen, blot gently with a clean cloth and follow with a mild, fabric-safe cleaner if necessary.
- Respect the frame: Avoid standing on the chair or dropping heavy items on it; even the best joinery has its limits.
Over time, your newly upholstered antique will develop its own very gentle patina – a softened arm, a slightly rumpled seat cushion – proof that it is loved and used, not just admired from afar.
Reviving an old chair is a conversation across time: between the hands that first built it, your own quiet work, and all the evenings to come when someone settles into its familiar embrace. With a few timeless techniques and a bit of patience, you can turn a tired relic into a cherished companion in your home – one that invites you to sit, breathe, and stay a little longer.