
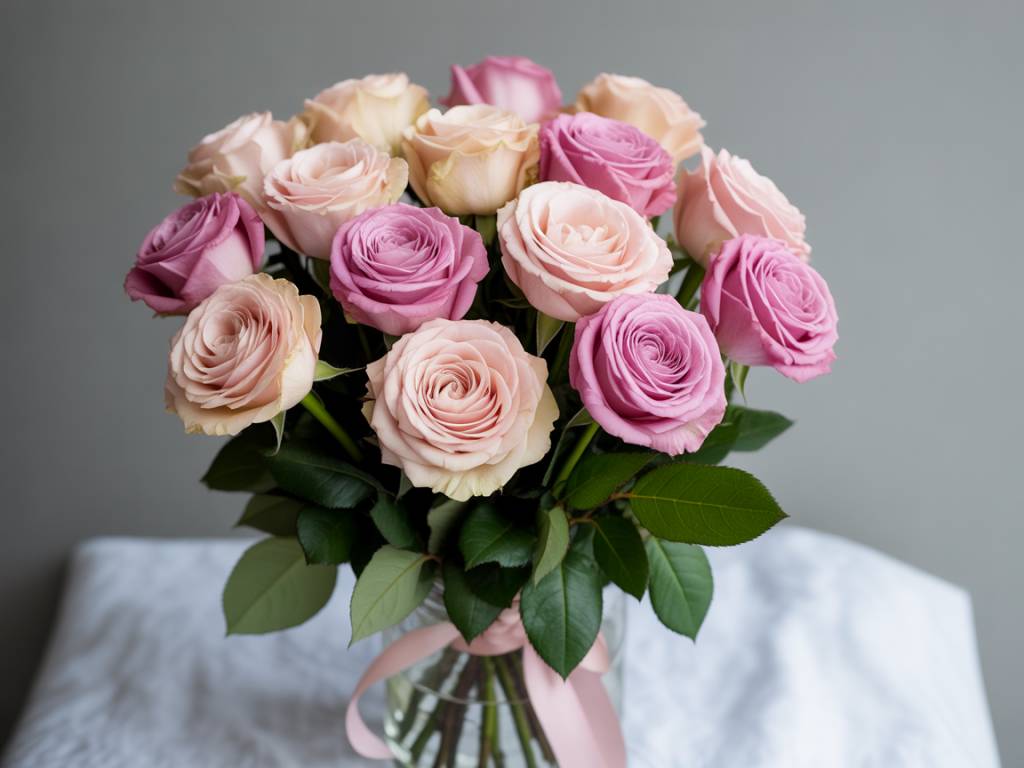
There is something quietly transformative about a vase of roses on a windowsill. Long before interior design became a discipline with rules and mood boards, roses were already at work — softening hard corners, scenting a room, making ordinary Tuesday mornings feel a little more worth celebrating. This guide walks you through everything you need to create a beautiful floral arrangement with roses: from choosing the right variety and colour palette to hand-tying a bouquet and styling a loose garden-inspired centrepiece — no floristry diploma required.
Why a floral arrangement with roses never goes out of style
Roses have adorned tables, altars and bedside shelves for centuries, and their appeal is far from accidental. Their layered petals catch light in a way few other flowers can, their fragrance shifts the atmosphere of a room within minutes, and their range — from wild-looking garden varieties to crisp, architectural long stems — means they suit almost every interior aesthetic.
Unlike trend-driven flowers that feel dated after a season, roses occupy that rare space between timeless and versatile. A single cream rose in a bud vase belongs on a Scandi shelf just as naturally as a tumbling arrangement of blush garden roses belongs on a French farmhouse table. That adaptability is precisely what makes them worth learning to arrange well.
Choosing the right roses for your arrangement
The success of any rose bouquet starts at the point of selection. Spend a little time with the flowers before committing — freshness, variety and colour all play a significant role in the final result.
Rose varieties worth knowing
- Garden roses: Full, many-petalled blooms in muted blush, ivory and soft apricot. They carry that romantic, old-world quality and open beautifully over several days.
- Spray roses: Multiple small blooms per stem, perfect for filling gaps and adding an airy, delicate texture to any arrangement.
- Long-stem classic roses: Clean and architectural — ideal for minimalist interiors and sleek, elegant vases.
- David Austin varieties: A favourite among florists for their cupped shape, quartered blooms and exceptional fragrance. Varieties like ‘Juliet’, ‘Miranda’ and ‘Patience’ are widely available at quality florists.
Colour palettes that stand the test of time
- Soft neutrals — ivory, cream, pale blush: effortlessly calm and flattering in light-filled rooms.
- Romantic pinks — dusty rose, ballet pink, mauve: warm and feminine, especially beautiful under candlelight or warm bulbs.
- Deep, moody tones — burgundy, plum, antique red: striking against pale walls, raw linen or dark wood surfaces.
For a cohesive, timeless look, limit your palette to two or three shades that blend rather than contrast sharply. Think watercolour washes rather than graphic, clashing blocks of colour.
Sustainability note: Look for locally grown roses or those carrying Fairtrade and Rainforest Alliance certification. Locally sourced flowers are typically fresher, last longer in the vase, and arrive with a significantly smaller carbon footprint.
Preparing your roses: the step everyone skips
The most romantic bouquets begin not with arranging, but with a quiet ten-minute preparation ritual. Skipping this step is the single most common reason roses wilt early or fail to open fully.
What you will need
- A clean vase or temporary bucket of fresh, cool water
- Sharp floral shears or a clean kitchen knife (never scissors, which crush the stem)
- A flower food sachet (optional but genuinely effective — it contains sugar, acidifier and a mild antibacterial agent)
Step-by-step preparation
- Hydrate immediately: The moment you bring roses home, place them in cool water while you prepare your tools. Avoid warm water — it accelerates petal drop.
- Strip lower foliage: Remove all leaves that would sit below the waterline. Submerged leaves rot within 24 hours and promote bacteria that block stems.
- Remove strategic thorns: Take off thorns that fall below the waterline or that might snag your fingers during arranging. Leave higher thorns intact — they help stems lean against each other naturally.
- Recut the stems: Slice 2–3 cm off each stem at a clean 45-degree angle. This both refreshes the cut and maximises the surface area available for water uptake.
- Condition before arranging: Allow roses to rest in fresh water for at least 30–60 minutes. Tight buds will begin to relax, and flowers that looked travel-weary will visibly revive. This patience pays dividends.
Vases and tools: building a small floral wardrobe
You do not need a cupboard full of specialist equipment. A modest, well-chosen selection of vessels will carry you through virtually any rose arrangement with ease.
Vase shapes and their best uses
- Wide-mouthed cylinder or glass hurricane: The workhorse — ideal for lush hand-tied bouquets and garden-style arrangements.
- Classic jug or pitcher: Brings an effortless, country-house warmth; works especially well with slightly wild, unstructured stems.
- Bud vases and small bottles: Perfect for single stems or tiny clusters on bedside tables, shelves or bathroom ledges.
- Low bowl or compote: Excellent for table centrepieces where low-profile arrangements allow conversation to flow freely across the table.
Useful supporting tools
- Clear tape grid: Stretch strips of clear tape across the mouth of a vase in a crosshatch pattern — this holds stems upright without foam and is fully recyclable.
- Kenzan (pin frog): A metal pin holder placed at the base of a bowl. Ideal for precise, foam-free ikebana-inspired arrangements.
- String or twine: Essential for hand-tied bouquets — natural jute twine adds a beautiful rustic detail when left visible at the stem.
Floral arrangement with roses: the classic hand-tied bouquet
A hand-tied bouquet is the most versatile rose arrangement you can learn. It works equally well placed in a vase at home or wrapped in tissue as a gift. The spiral technique at its heart is simpler than it looks, and it produces a naturally generous, rounded shape that always photographs beautifully.
What you will need
- 12–20 rose stems (a mix of full-size garden roses and spray roses works particularly well)
- A handful of greenery — eucalyptus, olive branches, fern fronds, or foliage from the garden
- Natural twine or ribbon for tying
Step-by-step: building your hand-tied bouquet
- Build a foliage foundation: Hold 3–4 stems of greenery loosely in your non-dominant hand. This forms the « nest » that will cradle your roses.
- Add the first rose: Place it slightly angled across the foliage — not straight up, but at roughly 30 degrees. Rotate the bouquet a quarter turn.
- Spiral as you go: Add each new stem (rose or foliage) at the same diagonal angle, rotating the bouquet slightly after each addition. This creates the spiral effect that gives hand-tied bouquets their characteristic structure.
- Vary heights deliberately: Let some roses sit slightly lower, others slightly higher. A strict flat top feels stiff; a gentle dome feels organic and romantic.
- Check from above: Look down at the bouquet regularly. You are aiming for a soft, even dome with no single bloom sitting awkwardly proud of the rest.
- Tie firmly: When satisfied with the shape, wrap twine tightly just below the blooms — this is the binding point. Secure with two or three knots.
- Trim the stems: Cut all stems flat at the same length, calibrated to the height of your chosen vase. Recut at 45 degrees before placing in water.
Loose garden-style rose arrangement: a romantic, relaxed approach
For something less structured — more an impression of roses than a formal arrangement — the garden-style approach is endlessly forgiving and looks genuinely luxurious with very little effort. It suits wide jugs, compotes and low bowls particularly well.
What you will need
- 8–15 roses in mixed sizes and varieties
- Airy filler flowers: waxflower, astilbe, sweet peas, or small daisies
- Generous garden foliage: herbs such as rosemary or mint, olive branches, or any soft-stemmed greenery
- A wide-mouthed vase, jug, or low compote
- Tape grid or kenzan to hold stems in position
Step-by-step: the garden-style arrangement
- Create your structure first: Lay a tape grid over the vase mouth, or place a kenzan at the base. This invisible scaffolding makes the entire process easier and the result more stable.
- Place foliage to define the silhouette: Insert greenery stems to establish the overall shape and height. Allow a few to drape over the vase edge — this softness is intentional and beautiful.
- Add focal roses off-centre: Place your largest, most open roses first, slightly off-centre and at varying heights. Resist the urge to cluster them all in the middle.
- Layer supporting roses around them: Rotate the vase as you work to ensure the arrangement reads well from every angle. Aim for a loose, flowing diagonal rather than a symmetrical grid.
- Weave in filler flowers: Use smaller blooms to soften edges, bridge any gaps, and give the arrangement a sense of movement — as though it has just been gathered from a garden path.
- Edit ruthlessly: Step back and remove anything that looks crowded or stiff. A garden-style arrangement should feel abundant but never cluttered. A little negative space adds sophistication.
Caring for your rose arrangement to make it last
A well-prepared and thoughtfully arranged bouquet can last anywhere from five to twelve days, depending on the variety and conditions. A few simple habits make all the difference.
- Change the water every two days and recut the stems slightly each time to prevent blockages.
- Keep roses away from fruit bowls: Ripening fruit releases ethylene gas, which accelerates petal drop in roses significantly.
- Avoid direct sunlight and heat sources: Roses last longest in a cool spot. Overnight, consider moving the vase to the coolest room in the house.
- Embrace the transition: As roses open and petals begin to fall, single blooms moved to bud vases can extend the beauty of your arrangement for several more days.
A rose arrangement is rarely over the moment the first petal drops. The most romantic thing about roses, perhaps, is how gracefully they evolve — from tight bud to full bloom to scattered petal — each stage quietly beautiful in its own way.