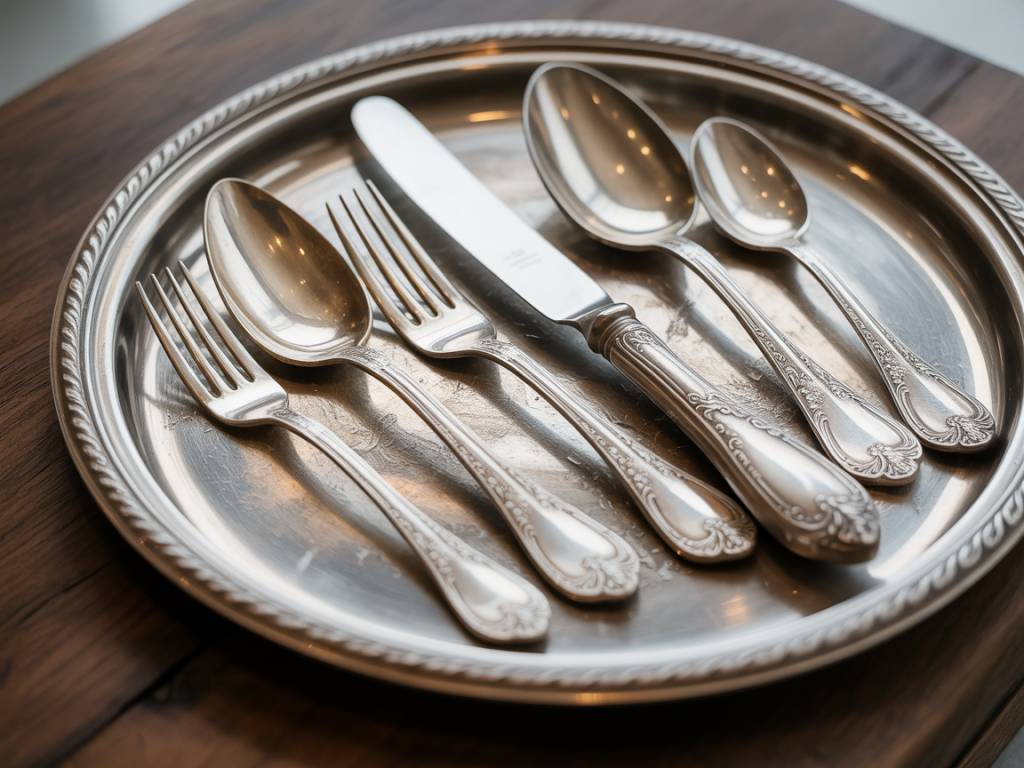
A silver tray catching afternoon light, a row of teaspoons gleaming beside a teapot, a serving fork that has graced three generations of Sunday lunches — polished silverware does something quietly powerful to a room. It signals care, attention and a respect for beautiful things. Yet for many of us, that tarnished drawer stays shut a little longer than it should, held back by uncertainty. How hard can you rub? What products are safe? Will you accidentally strip away decades of patina in one overzealous session?
Learning how to polish silverware safely for a lasting shine on trays, cutlery and heirloom pieces is less about elbow grease and more about understanding the material in front of you. Once you do, polishing becomes a ritual of care rather than a gamble.
Why Silver Tarnishes — and Why a Little Patina Is Not Your Enemy
Tarnish is not dirt. It is chemistry. Silver reacts with sulfur compounds present in the air, in certain foods (eggs, onions, mustard), in rubber bands, wool storage and even some cleaning products. The result is silver sulfide — that familiar dark, sometimes iridescent layer that builds up over weeks and months.
The reassuring truth: tarnish is a sign that your piece is real silver, not a flaw to be ashamed of. A very light patina can actually enhance the character of engravings and decorative reliefs, adding depth that makes patterns read more clearly. The goal when polishing is not to make heirlooms look factory-fresh, but to restore a warm, even glow while preserving their age and story.
How to Polish Silverware Safely: Start by Knowing What You Have
Before reaching for any product, spend two minutes identifying each piece. The approach differs significantly depending on the type of silver you are working with.
- Sterling silver: Stamped with « 925 », « Sterling » or, on British pieces, a lion passant hallmark. It is solid silver throughout and the most forgiving to polish.
- Silver-plated pieces: A thin silver layer over a base metal such as brass or nickel. Look for markings like « EPNS » (electro-plated nickel silver), « Silver Plate » or « EP ». Polish too aggressively and you risk exposing the base metal — there is no more silver underneath once it’s gone.
- Heirlooms with no visible markings: Treat as silver-plated to be safe. The gentle approach costs you nothing but a little extra time.
- Pieces with mixed materials: Wooden, bone or ivory handles, glued decorative inlays, velvet-lined boxes — these elements react badly to water, soaking and harsh chemicals. Work around them carefully.
What to Avoid When Polishing Silverware
The internet is full of dramatic before-and-after « hacks » that promise instant shine. Some work; many come with a hidden long-term cost. Here is what to skip, especially on heirlooms and plated pieces.
- Abrasive powders and scouring pads: Steel wool, rough sponges and gritty powders will scratch silver’s surface permanently, dulling rather than brightening it over time.
- Toothpaste: A commonly suggested tip, but most toothpaste formulas are far too abrasive for silver, particularly plated items. Fine scratches accumulate fast.
- Bleach and ammonia-based cleaners: Corrosive and damaging to both silver and any adhesive or decorative elements.
- Overuse of the aluminium foil and baking soda bath: This electrochemical method reverses tarnish efficiently but can strip desirable patina entirely and leave an uneven matte finish. Reserve it for heavily tarnished everyday items, never for heirlooms.
- Soaking knives with hollow or glued handles: Water seeps into the joint and weakens or destroys the bond. Always hand-wash these individually without immersing the handle.
- The dishwasher: Heat, harsh detergents and contact with other metals cause irreversible damage to silver and silver-plated pieces alike.
Your Silver-Care Toolkit
You do not need a complicated arsenal. A small, thoughtful selection of supplies will handle almost every situation.
- Soft cotton or microfibre cloths: Old, clean cotton T-shirts are ideal — lint-free and gentle.
- Mild, unscented dish soap: Free from added moisturisers or bleaching agents.
- A dedicated silver polish cream or paste: Choose a reputable brand that specifies non-abrasive and safe for silver — not brass, not chrome, not multi-metal.
- Soft toothbrush or an artist’s paintbrush: For intricate engravings, hinges and embossed rims.
- Cotton buds (Q-tips): Precise application of polish to detailed areas without over-saturating delicate spots.
- A basin of warm water: Not hot, to protect glued parts and inlays.
- A soft towel as a work surface: Prevents scratching and absorbs any drips.
Step One — Wash Before You Polish
Polishing over grease, dust and fingerprints means rubbing those particles across the surface. Always wash first.
- Fill a basin with warm (not hot) water and a single drop of mild dish soap.
- Place a folded cloth at the bottom of the basin so pieces do not clink against the hard surface.
- Wash each piece individually using your fingers or a very soft cloth. Do not pile them in together.
- Use a soft toothbrush around engravings, raised patterns and hinges.
- Rinse thoroughly under clean warm water to remove all soap residue.
- Dry immediately and completely with a soft cloth. Air-drying causes water spots.
You will often be surprised at how much shine a proper wash alone can restore. Polishing then becomes a light finishing step rather than a full rescue operation.
Step Two — How to Polish Silverware Safely with a Dedicated Silver Polish
For trays, cutlery and heirloom pieces, a good commercial silver polish remains the most controlled and predictable option. Follow this method for reliable, lasting results.
- Test on a small area first: Choose an inconspicuous spot, especially on older or sentimental pieces. Check the effect on patina and surface colour before committing to the whole piece.
- Apply polish to the cloth, not to the silver: A small, pea-sized amount on a soft cloth is sufficient for a medium-sized tray. Less is genuinely more with silver polish.
- Work in sections with linear strokes: Avoid circular motions, which can leave visible swirl marks on flat surfaces. Work along the length of spoons and forks, and across the grain of trays.
- Allow the polish to haze: Most quality polishes need a moment to turn cloudy before buffing — follow the product’s timing guidance.
- Buff with a clean part of the cloth: Turn the cloth frequently so you are lifting tarnish away, not redistributing it. The shine will emerge progressively.
- Use cotton buds for detail work: A little polish on a cotton bud, applied with a light touch, lifts tarnish from engraved lettering and decorative borders without flooding the design.
- Wipe down and dry fully: Remove any polish residue with a clean damp cloth, then buff dry. Polish left in crevices can dull over time.
Natural Methods Worth Using — and How to Use Them Responsibly
If you prefer to minimise chemical products at home, a few natural approaches can complement your routine. The key word is complement — these work best as maintenance tools, not as the primary method for heirlooms.
Mild Baking Soda Paste
Mix one tablespoon of baking soda with enough water to form a loose paste. Apply with a soft cloth using gentle, linear strokes on sterling silver everyday items. Rinse thoroughly and dry immediately. Do not use on plated pieces or anything with engraved details, as the mild abrasive can soften fine lines over repeated use.
White Vinegar and Baking Soda Soak
For small, sturdy sterling silver items with heavy tarnish, a short soak (two to three minutes maximum) in a mixture of half a cup of white vinegar and two tablespoons of baking soda can lift surface tarnish effectively. Rinse and dry thoroughly afterwards. Again, avoid plated pieces and anything with hollow handles or fragile joins.
Lemon Juice and Salt
A very diluted lemon juice solution (one part juice to ten parts water) with a pinch of salt can brighten lightly tarnished sterling silver cutlery. Use sparingly, rinse immediately and dry completely. Acids left on silver even briefly will continue to react with the surface.
Making the Shine Last: Storage and Ongoing Care
Polishing is far easier when you slow down the rate of tarnishing between sessions. These habits make a measurable difference.
- Store in anti-tarnish cloth or bags: Specially treated silver storage cloths absorb sulfur compounds and dramatically slow tarnish formation. Available from most silverware and homeware retailers.
- Keep away from rubber: Rubber bands and rubber drawer liners accelerate tarnishing significantly. Use cotton or felt-lined drawers instead.
- Avoid wool proximity: Wool releases sulfur as it breathes. Do not store silver wrapped in woollen fabric.
- Place chalk or silica gel sachets in storage boxes: These absorb moisture, reducing the conditions in which tarnish forms.
- Handle with clean, dry hands: Fingerprints transfer oils and salts that hasten tarnish. Cotton gloves are ideal when handling polished heirlooms.
- Use silverware regularly: Counterintuitively, silver that is used and hand-washed gently on a regular basis tarnishes more slowly than silver that sits unused. The gentle friction of use and careful washing keeps the surface active.
Silver that is cared for consistently — washed promptly after use, stored thoughtfully and polished at the first sign of dullness rather than left until heavily tarnished — responds beautifully and holds its shine far longer between sessions. The pieces worth the most to us, whether monetarily or sentimentally, deserve exactly that level of attention.